User ID Security
Signature CaptureCreating a Digital Signature To create a signature file complete the following steps:
Open the Mekorma Signature Signature Library window (Mekorma Area Page > Setup > System > Signature Library) Choose Import and browse to select the signature image file you wish to use on your checks and click Open Signature files can then be assigned to one or more companies. In the Available in Company section of the Signature Library window check the box next to each company that the signature will be used Threshold are optionalThresholds do we need them? When the business determines signatures will automatically be printed Set the Signature Threshold according to the business rule Signature Setup and Assign
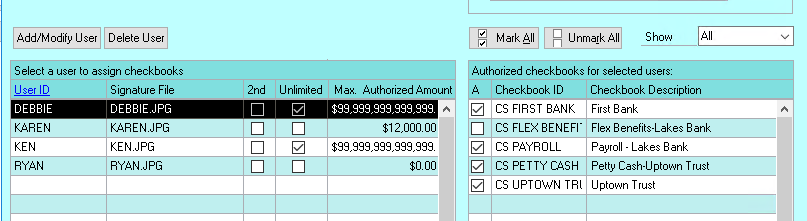
Click Add/Modify User Troubleshoot signature topics and issuesI have setup my checkbooks to print the new signature. Why does the old signature still print? How can I delete a signature from the Mekorma Signature Library? Where are the signatures stored? The signature is not printing How can I override the business logic to suppress the signature from printing? The signature line displays on the test check, but doesn't print on the "Live" check. The signature (or logo) on the check is fuzzy. Does Mekorma Encrypt Electronic Signatures? Recommend practices for the use of image files The signature sits on top of the EFT VOID field, is that a problem? Will a Troy printer work with Mekorma MICR? |